# MicsApp Web Terminal
MicsApp Web Terminal provides a real server shell in a browser, with persistent sessions, tabs, split panes, a file browser/editor, saved commands, notes, voice input and optional remote desktops. Your administrator supplies the server URL and account. The [project repository](https://github.com/micsapp/micsapp-webterminal) contains deployment documentation; this guide explains the everyday interface and the companion **mics_cli** client.
| At a glance | Details |
| --- | --- |
| Best for | Working on a Linux server from a desktop, tablet, Chromebook or phone |
| Access | A server address and system username/password supplied by the administrator |
| Session persistence | Shells live in tmux on the server and can be reattached from another browser |
| Files | Actual server files accessible to your system account; edits and deletes affect them |
| Saved commands and notes | Stored on the server for your account |
| Appearance and open tabs | Browser-local preferences/layout, with live server sessions listed separately |
| Optional services | Remote-server entries, voice transcription and VNC depend on administrator configuration |
**On this page**
- [Sign in and run your first command](#sign-in-and-run-your-first-command)
- [Understand the toolbar](#understand-the-toolbar)
- [Open, rename, restore and close tabs](#open-rename-restore-and-close-tabs)
- [Arrange split panes and tiles](#arrange-split-panes-and-tiles)
- [Attach sessions from another device](#attach-sessions-from-another-device)
- [Send a command to one or several sessions](#send-a-command-to-one-or-several-sessions)
- [Write, save and dictate Notes](#write-save-and-dictate-notes)
- [Browse folders, paths and recent locations](#browse-folders-paths-and-recent-locations)
- [Upload, create, download, rename and delete files](#upload-create-download-rename-and-delete-files)
- [Preview and edit files in the browser](#preview-and-edit-files-in-the-browser)
- [Build and search your quick-command library](#build-and-search-your-quick-command-library)
- [Set fonts, cursor, scrollback and app name](#set-fonts-cursor-scrollback-and-app-name)
- [Choose a theme or custom colors](#choose-a-theme-or-custom-colors)
- [Open configured remote servers and desktops](#open-configured-remote-servers-and-desktops)
- [Work from phones and tablets](#work-from-phones-and-tablets)
- [Use desktop keyboard shortcuts](#use-desktop-keyboard-shortcuts)
- [Create and revoke API tokens](#create-and-revoke-api-tokens)
- [Use mics_cli and multiple server profiles](#use-mics_cli-and-multiple-server-profiles)
- [Read Help and report a problem](#read-help-and-report-a-problem)
- [Troubleshooting](#troubleshooting)
## Sign in and run your first command
1. Open the HTTPS address your administrator provided, for example `https://terminal.example.com`.
2. Enter **Username** and **Password**, then **Sign in**.
3. Wait for the terminal and prompt. Click the terminal pane to focus it.
4. Enter `pwd` and press Enter to see the current server directory. Enter `ls` to list files.
5. Use **+ New Tab** for another shell without closing the first.
The account is a server system account, not a new website registration. Login errors can mean an incorrect password or an account that the administrator has not enabled. The shell uses the account's permissions; a browser connection does not grant access to other users' files.
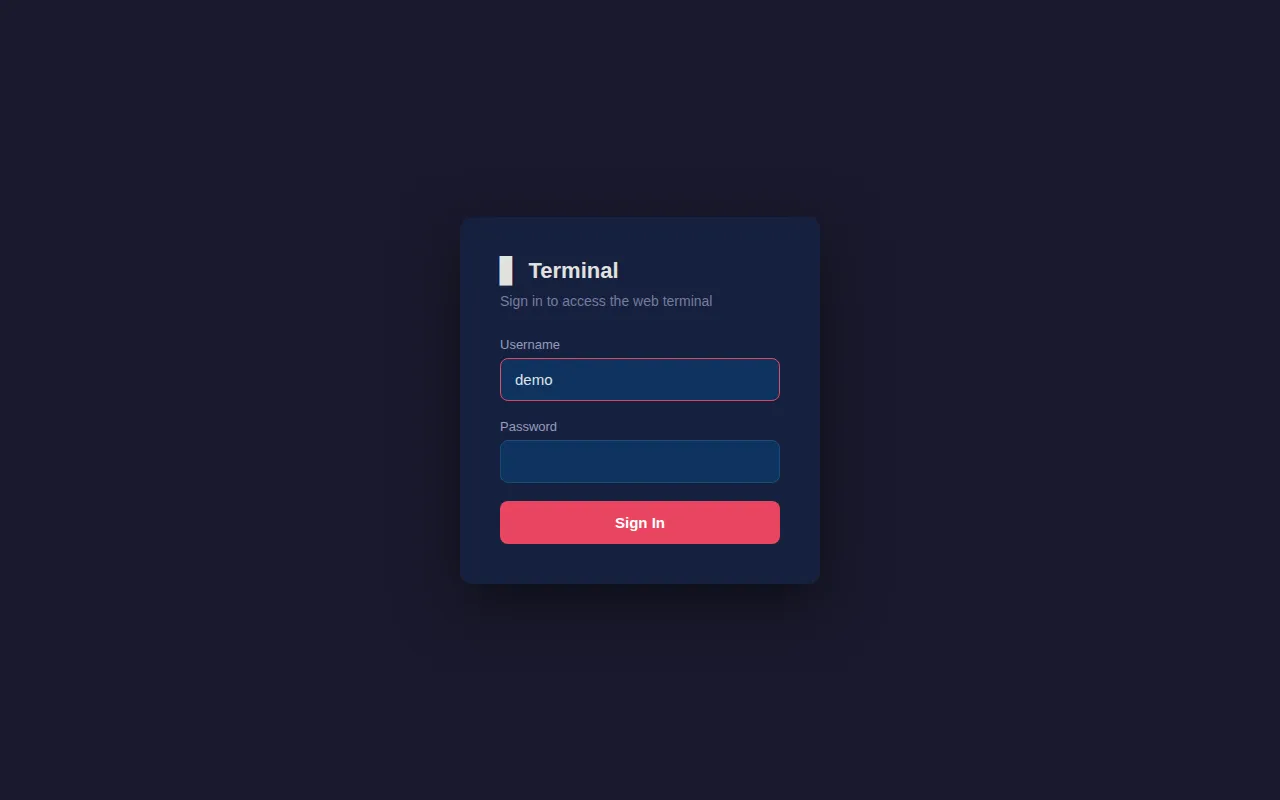
The sign-in form using the fictional demo username. Select the image to enlarge it.
All screenshots show an isolated sandbox with a made-up demo user, fake remote-server entries and a small weather-station project. They do not show the owner's server files or credentials. Local terminal, sessions, commands, notes and file editing were exercised; external SSH, physical-device dictation and VNC depend on services outside this walkthrough.
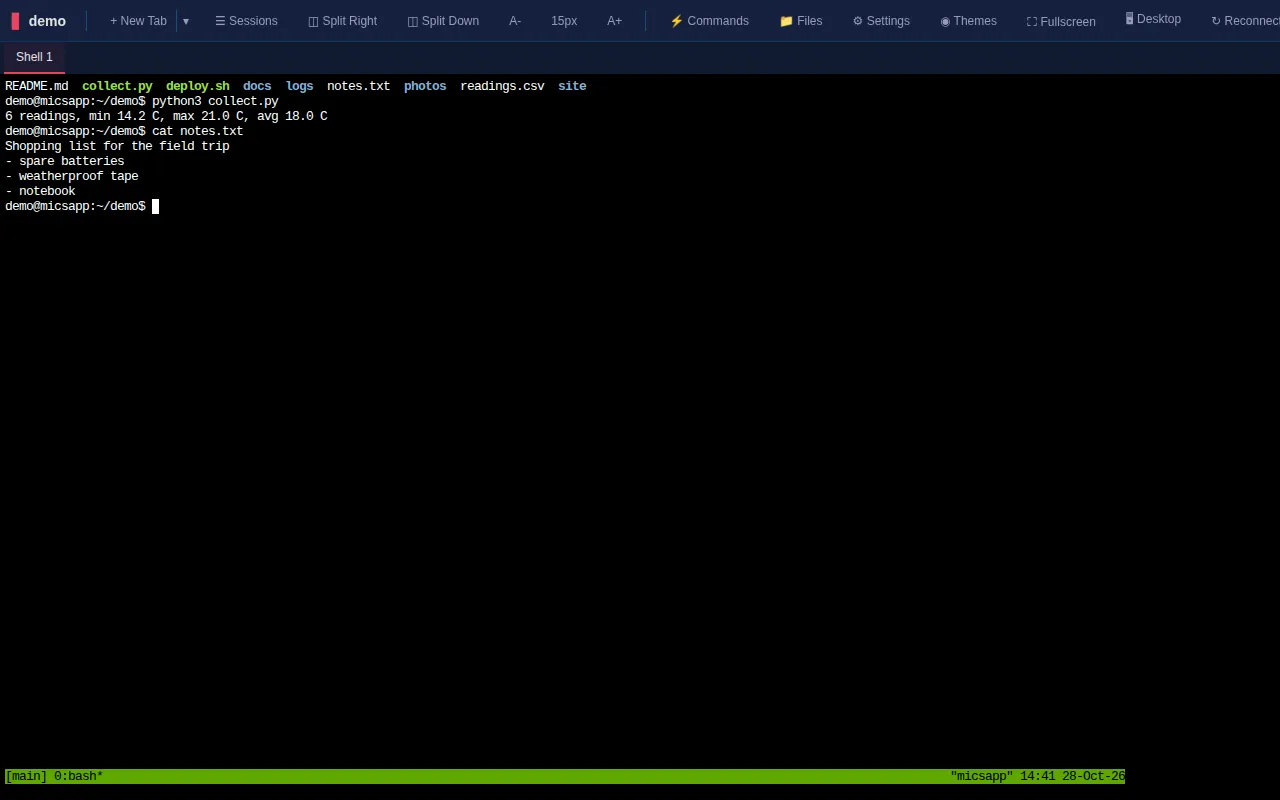
A demo terminal running a small weather-data script and reading fictional notes. Select the image to enlarge it.
## Understand the toolbar
| Button | Use |
| --- | --- |
| **+ New Tab** and adjacent **▾** | Open a local shell or a configured remote connection |
| **Sessions** | Find, attach, tile or end server sessions and compose commands/notes |
| **Split Right / Split Down / Unsplit** | Arrange terminals side by side or stacked |
| **A− / A+** | Decrease/increase the terminal font; the current size appears between them |
| **Commands** | Open the saved quick-command library |
| **Files** | Open the file browser |
| **Settings / Themes** | Configure typography, cursor, history, app name and colors |
| **Fullscreen** | Use browser fullscreen where supported |
| **Desktop** | Open the optional VNC desktop |
| **Reconnect** | Reattach the terminal connection |
| **Help / About** | Read the illustrated manual or check version/build/user |
| **Logout** | End the browser login |
Buttons that do not fit on a narrow display move into **Menu**. The terminal must have focus for ordinary typing and terminal shortcuts. Clicking a text field, dialog or another pane changes where input goes.
## Open, rename, restore and close tabs
1. Choose **+ New Tab** to create another server shell.
2. Select a tab name to bring it forward.
3. Double-click its name to rename it. The server session name updates for other devices attached to it.
4. Use an app tab's close control only when you intend to end its underlying shell and programs.
5. Open **Sessions** to attach a shell that is still running on the server.
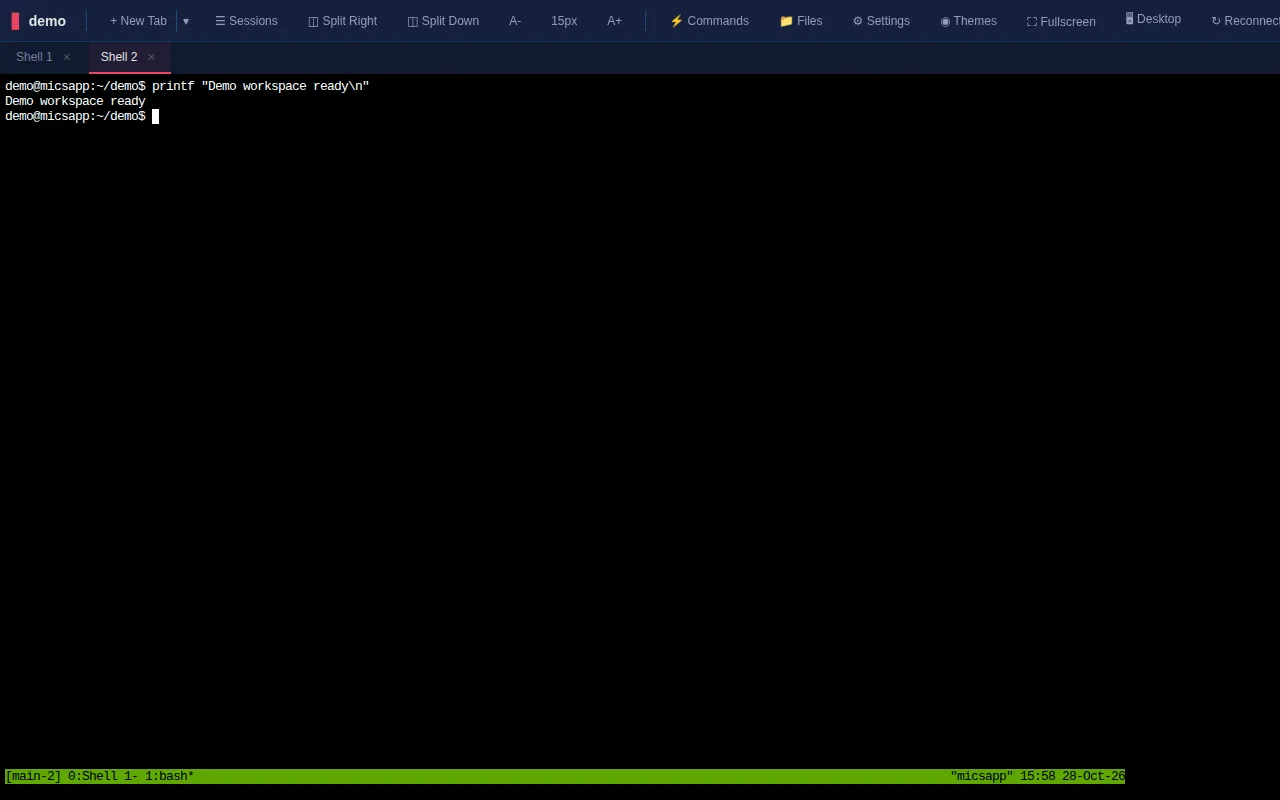
Two local terminal tabs in the demo workspace. Select the image to enlarge it.
Closing the browser page preserves tmux shells. Closing an app tab with its **×** explicitly kills the associated tmux window, so its programs end on every attached device. **Sessions → ✕** and entering `exit` also end a shell. A server restart can end processes unless the server has separate restart arrangements.
The browser remembers its open app tabs for reload, while **Sessions** lists actual server sessions. If an old tab is blank, try **Reconnect** or attach the session through Sessions rather than immediately starting a replacement job.
## Arrange split panes and tiles
1. Choose **Split Right** for side-by-side panes or **Split Down** for a vertical stack.
2. Click a pane to make it active, then choose the tab to display in it.
3. Drag a divider to resize the panes.
4. Choose **Unsplit** to return to one pane.
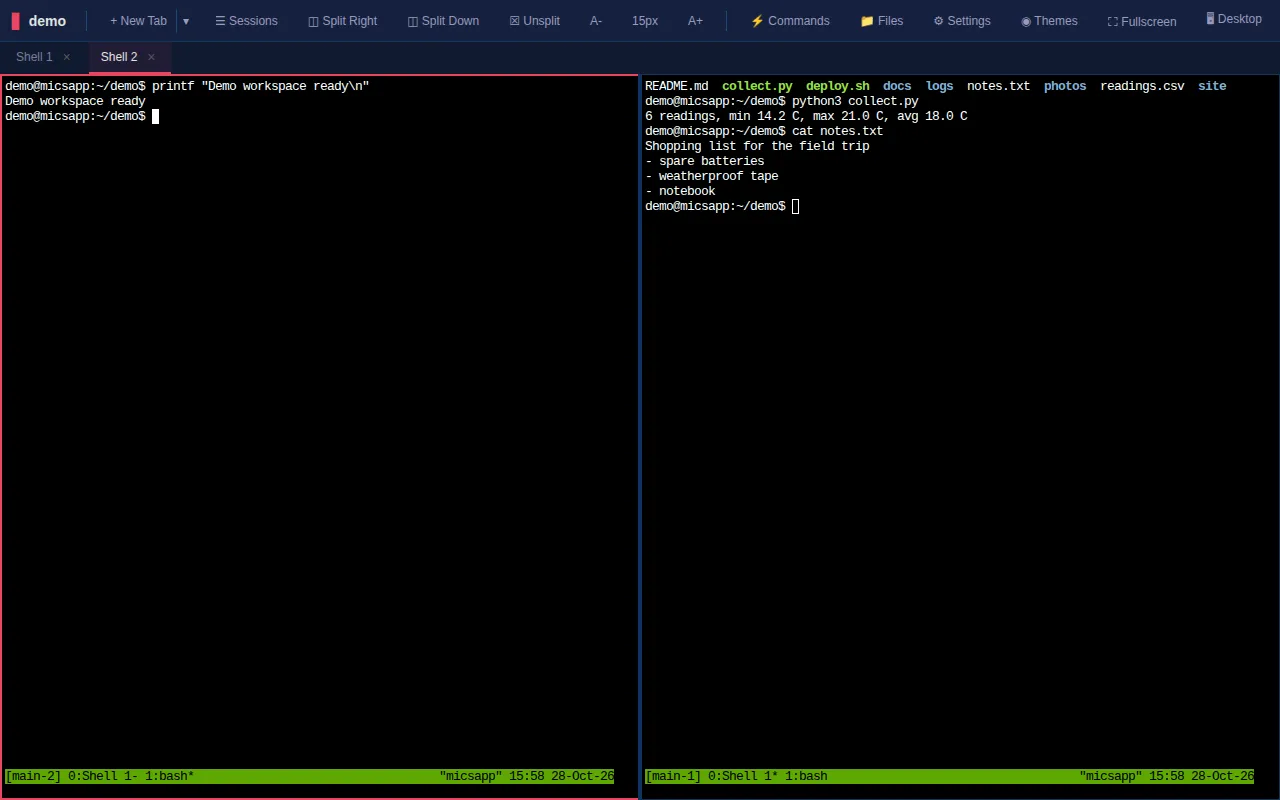
Two live demo shells displayed side by side. Select the image to enlarge it.
For several existing sessions, open **Sessions** and choose **Tile all**, or tick specific sessions and choose **Tile selected**. This arranges sessions into a grid. Splitting is disabled below 768 pixels wide, so use tabs on a phone or increase the available width on a tablet.
Keep the active pane clear before typing: a command runs in the focused shell, even when another pane looks more prominent.
## Attach sessions from another device
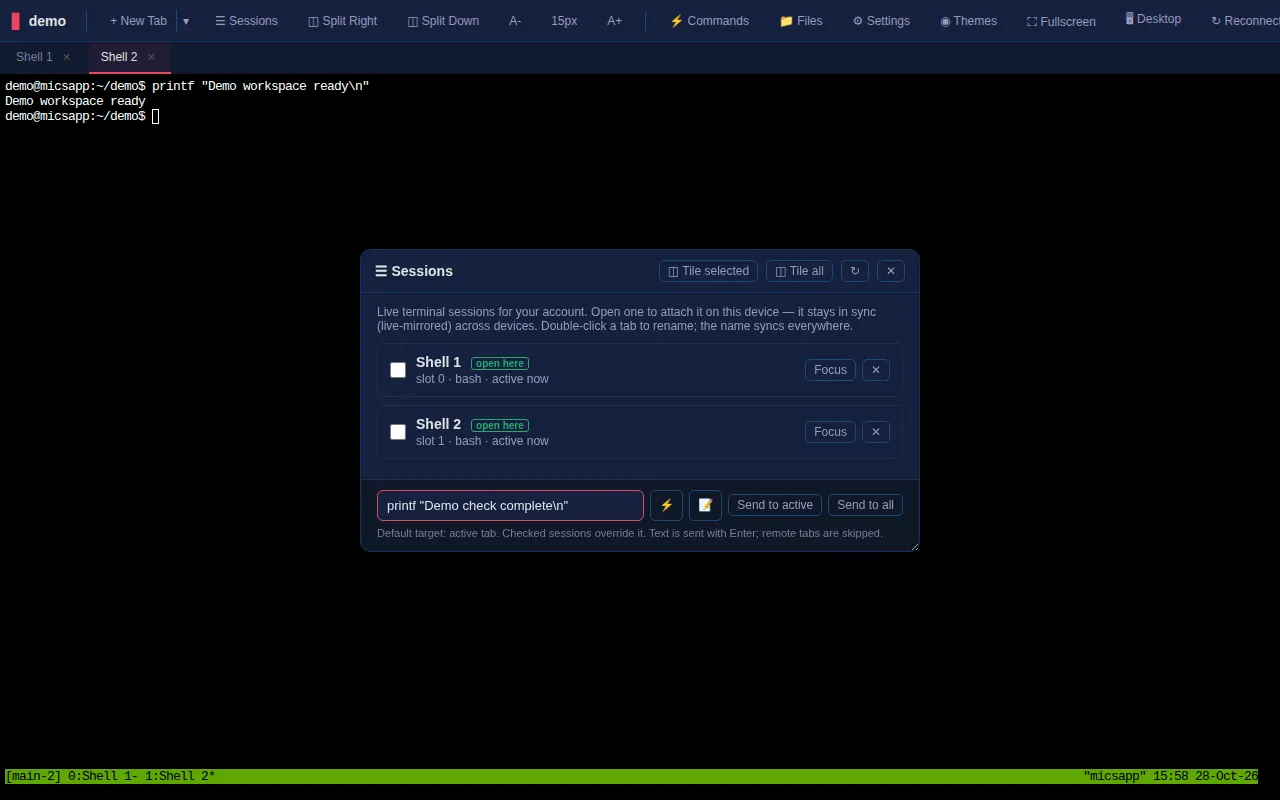
Open **Sessions** to see live shells for your account, with names, slots, running command, activity and pane count. **Open** attaches one to this browser; **Focus** selects a session already open here. **open here** identifies local attachments and **remote** identifies remote SSH tabs. Use refresh to update the list.
Start a harmless long-running command on one device, then open that same account/session from another device to watch it continue. Both attachments are live views of the same shell, so typing in one can affect the other.
The live-session list and command composer in the isolated sandbox. Select the image to enlarge it.
Use the row's **✕** only when you intend to end the underlying session and its programs for every device. The app-tab close control also kills its associated shell; closing the browser page alone preserves it. The guide's screenshots show demonstration sessions only.
## Send a command to one or several sessions
The bottom of the Sessions dialog includes **Command to send…**, a quick-command picker and a Notes button.
1. Type a command, or choose the lightning-bolt picker to insert a saved command.
2. Review it before sending.
3. With no rows checked, **Send to active** targets the focused terminal.
4. Tick rows to change the default to **Send to selected (n)**.
5. **Send to all** targets all eligible local sessions after confirmation.
Sending includes Enter, so the command executes rather than merely appearing as editable text. It can run in a server session that is not an open browser tab. Remote SSH and graphical desktop tabs are skipped by the local-session broadcast path.
The checked selection determines the target; clear it to return to the active shell. Start with a simple `pwd` or `printf` when learning the composer so you can confirm the destination.
## Write, save and dictate Notes
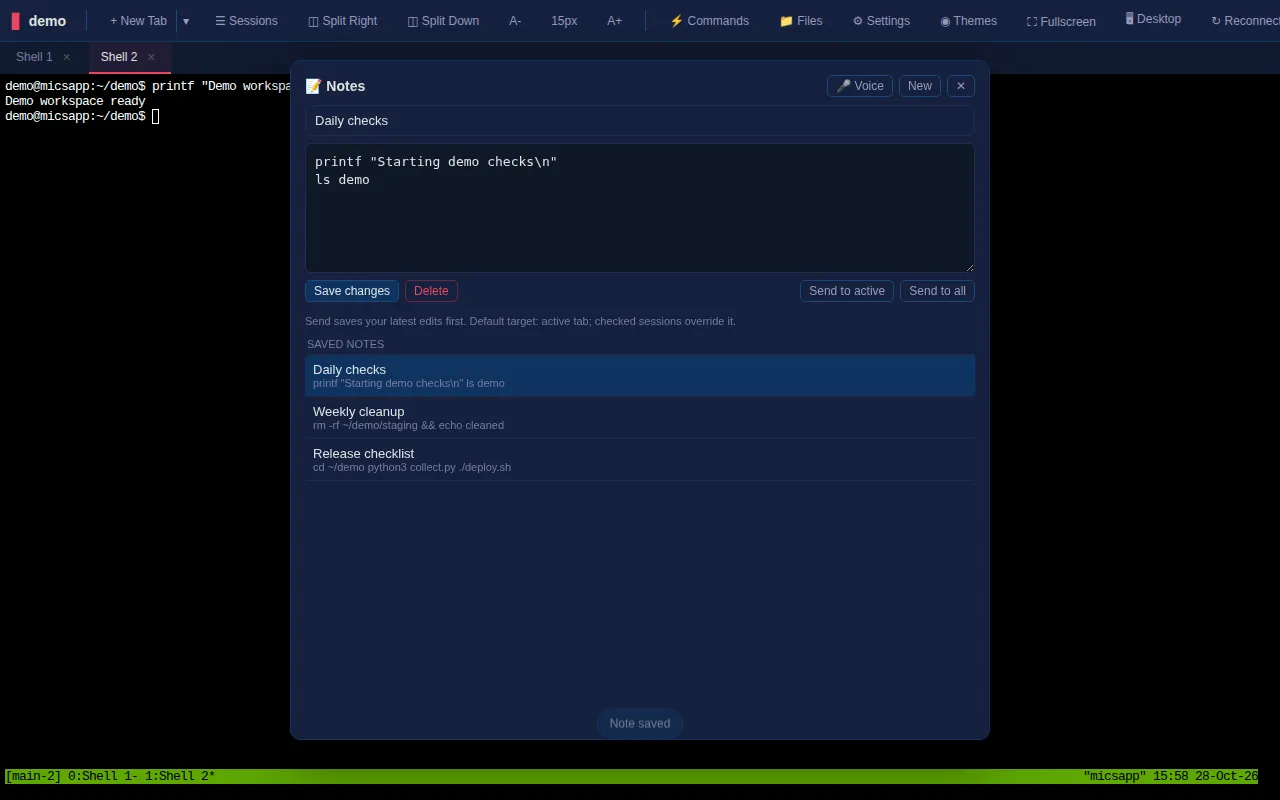
1. In **Sessions**, choose the Notes button beside the command field.
2. Enter an optional **Note title** and your text. The editor supports multiple lines without phone autocorrection, capitalization or spellchecking changing commands.
3. Choose **Save note**; when editing an existing note the control can read **Save changes**.
4. Select a saved note to reopen it; **New** starts another and **Delete** removes the selected note.
5. Use **Send to active**, **Send to selected (n)** or **Send to all** when the text is ready to execute.
A saved demo note containing a harmless multi-line check. Select the image to enlarge it.
Editing does not send anything to a terminal. Sending saves the latest edits first. The note editor allows up to 32,768 characters and its title up to 200. Notes are stored for the account on the server, making them available on another logged-in device.
**Voice** starts dictation; **Stop** ends it. Desktop uses browser speech recognition when available. Mobile captures phrases for server transcription and removes temporary audio afterward. Microphone permission, HTTPS and the configured transcription service are required. Dictation produces text to review; shell syntax, punctuation and names still need checking before Send. `Enter` uses the default target; `Ctrl+Enter`/`Cmd+Enter` sends to all from the composer.
## Browse folders, paths and recent locations
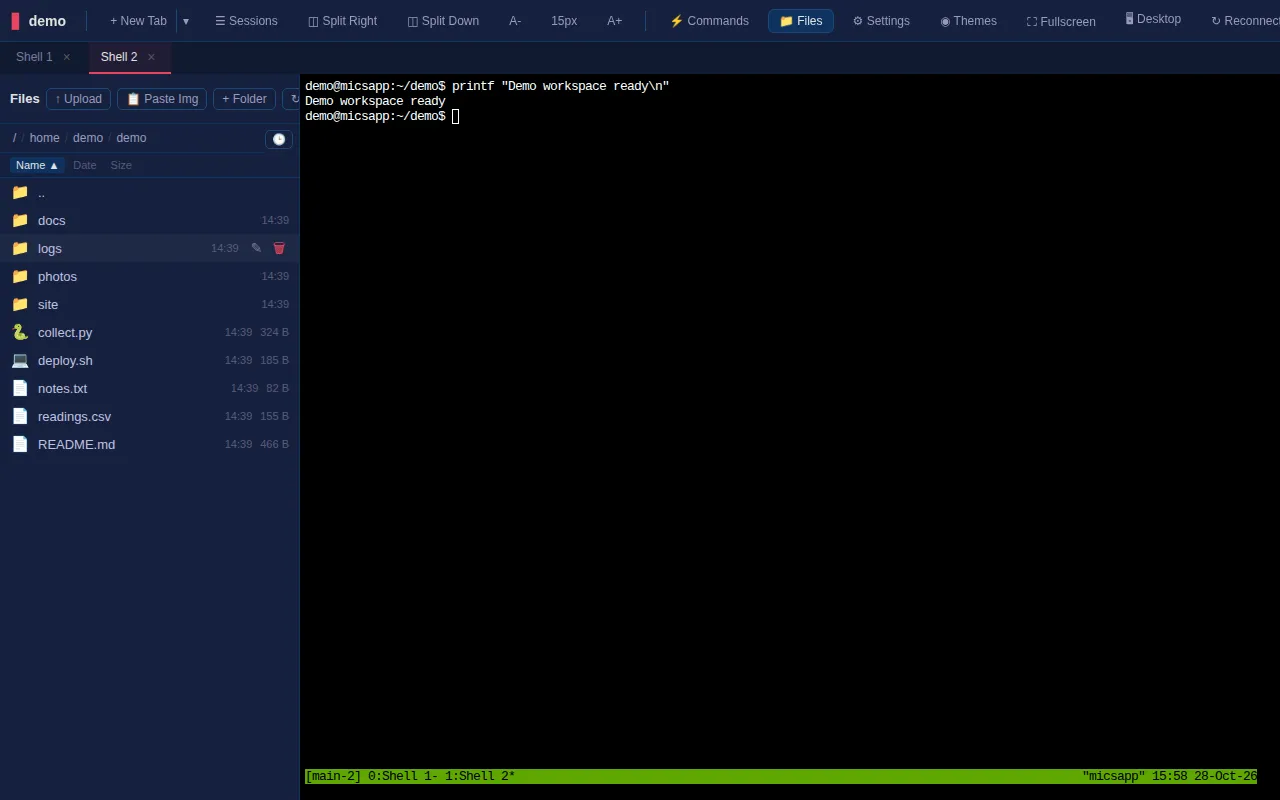
Choose **Files** to open the sidebar, or use `Ctrl+Shift+E`.
| Action | Procedure |
| --- | --- |
| Open a directory | Select its folder row |
| Go up | Select **..** |
| Jump to an ancestor | Select a breadcrumb segment |
| Enter a path | Double-click the breadcrumb bar, type it and confirm |
| Return to a recent directory | Open **Recent folders** beside the path bar |
| Sort | Select **Name**, **Date** or **Size** to change order |
| Refresh | Use the refresh control |
| Enlarge the browser | Use its Fullscreen control; drag the sidebar edge to resize where available |
The Files sidebar showing only the fictional weather-station project. Select the image to enlarge it.
The file browser acts on the server filesystem under your account's permissions. It is not a separate cloud drive or a local-computer file manager. A path that works in one server's file browser may not exist on a remote connection.
## Upload, create, download, rename and delete files
1. Navigate to the intended destination folder.
2. Choose **Upload** and select files, or drag files onto the sidebar.
3. Choose **+ Folder** and enter a name for a new directory.
4. Use **Paste Img** to save an image from the clipboard after supplying a filename. Browser clipboard permission and supported image content are required.
5. Use a row's **Download**, **Rename** or **Delete** action. Delete asks for confirmation.
Uploads and filename changes affect the selected server directory. Check destination and overwrite prompts before accepting them. Download also appears in the preview toolbar. If browser or proxy upload limits reject a large file, split it or use an administrator-approved transfer route.
## Preview and edit files in the browser
Select a file to open a preview window. Several previews can be open, dragged by their title bars and enlarged with the preview's fullscreen control.
| Type | Available experience |
| --- | --- |
| Text / source code | Syntax-highlighted view and **Edit**, then **Save** or **Cancel** |
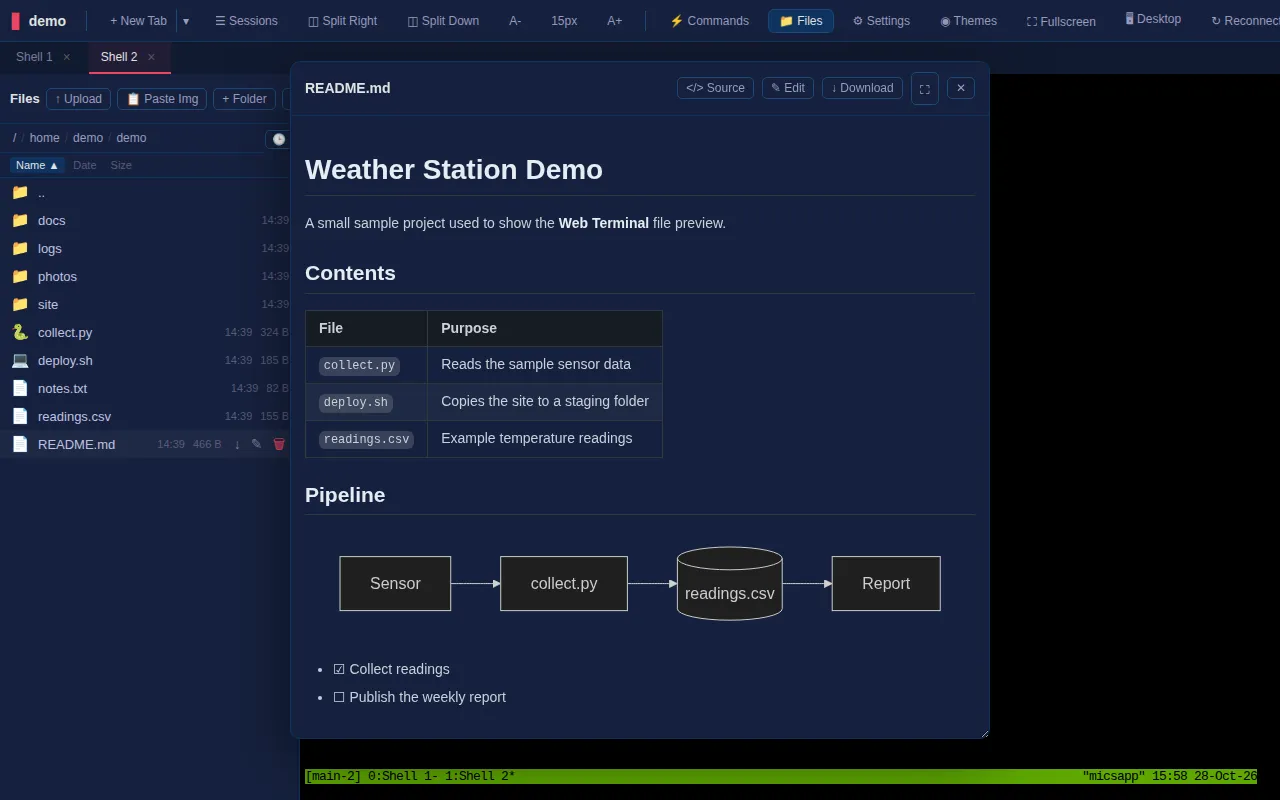
| Markdown | Rendered document with **Source** toggle and editing |
| HTML | Source with **Render** toggle to inspect rendered output |
| Image | Image preview |
| Audio / video | Native media controls |
| PDF | Embedded viewer where the browser supports it |
A rendered demo Markdown file including a small project diagram. Select the image to enlarge it.
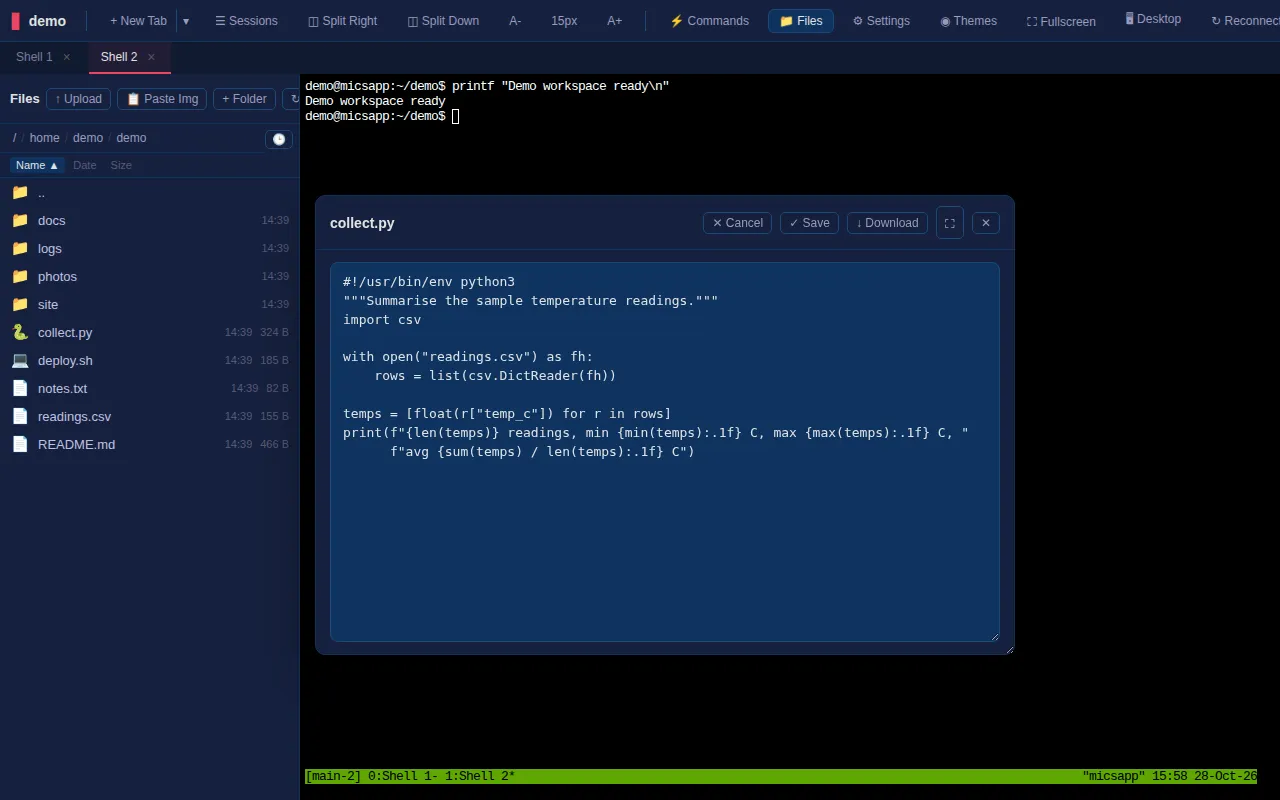
For text editing, choose **Edit**, change the content, then **Save** to write it back to the actual file. **Cancel** leaves the file unchanged. If you only wanted a local copy, choose **Download** instead.
Editing the fictional collect.py script in the file-preview window. Select the image to enlarge it.
A format that the browser cannot decode may still download correctly. Some documents require external resources or scripts that do not work inside a preview; use the original application when necessary.
## Build and search your quick-command library
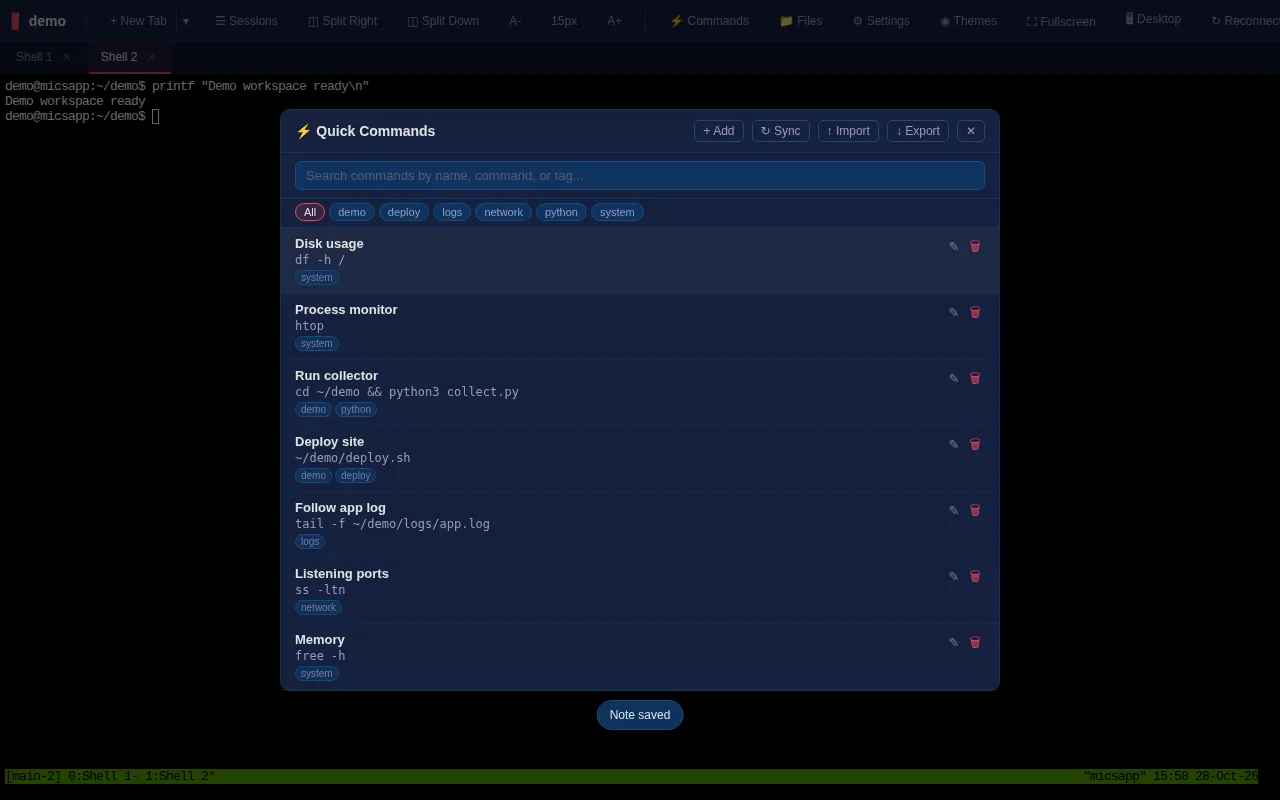
Open **Commands** to see saved commands with names, text and tags.
1. Type in **Search commands by name, command, or tag...**, or select a tag chip.
2. Select a command to submit it to the active terminal.
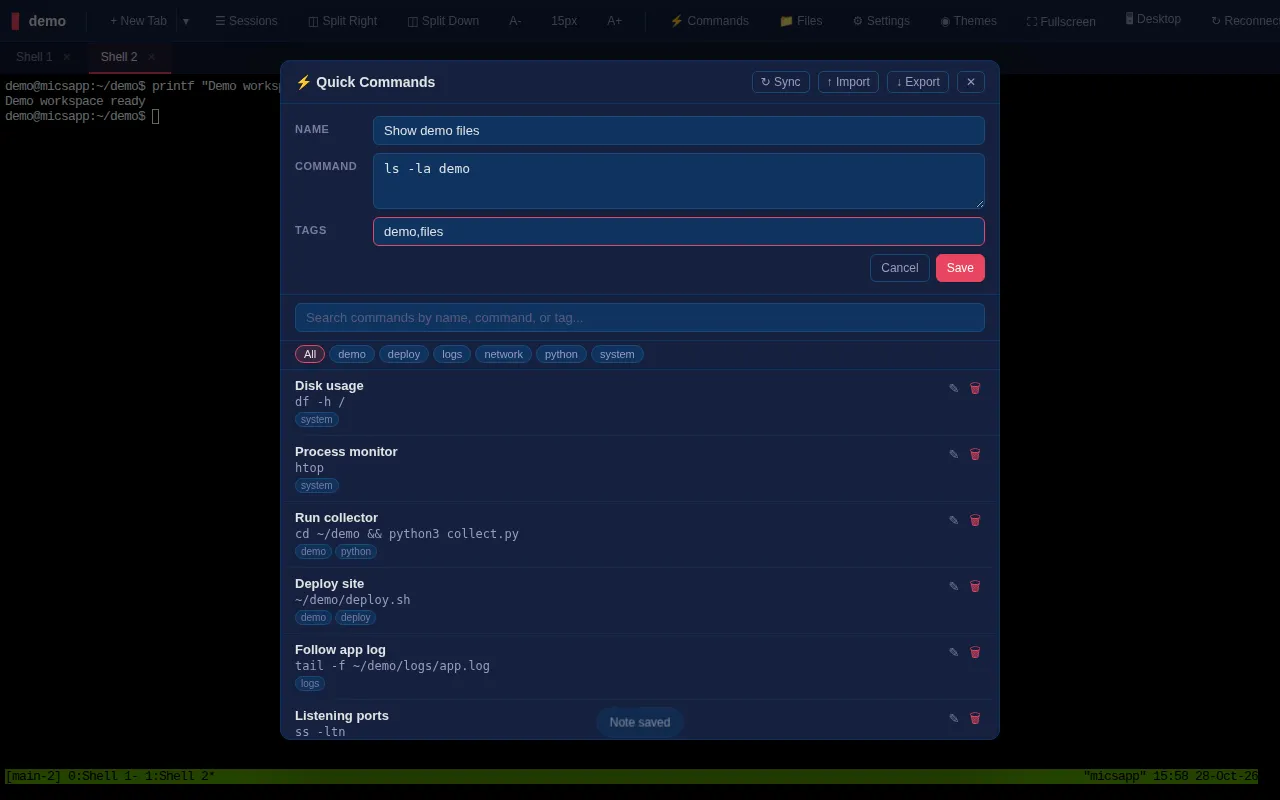
3. Choose **+ Add**, enter **Name**, **Command** and comma-separated **Tags**, then **Save**.
4. Use a row's edit/delete controls to maintain an existing entry.
The quick-command library with fictional project commands and tags. Select the image to enlarge it.Adding a named command and comma-separated tags. Select the image to enlarge it.
Selecting a command from the main library runs it. The Sessions lightning-bolt picker instead helps compose a command for a chosen target, giving you an opportunity to review it before Send.
### Import, export and synchronize commands
**Export** downloads JSON. **Import** selects a compatible JSON array with at least `name` and `command` per entry, plus optional `tags`. In the browser, matching names are merged case-insensitively: imported text/tags update the corresponding command, while new names are added. Review imported commands before running them.
**Sync** merges your library with the shared repository configured by the administrator. It adds/updates entries rather than propagating deletions, so a command deleted locally can return if it still exists in the shared repository. An unconfigured/unreachable repository produces a sync error; local saved commands still work.
## Set fonts, cursor, scrollback and app name
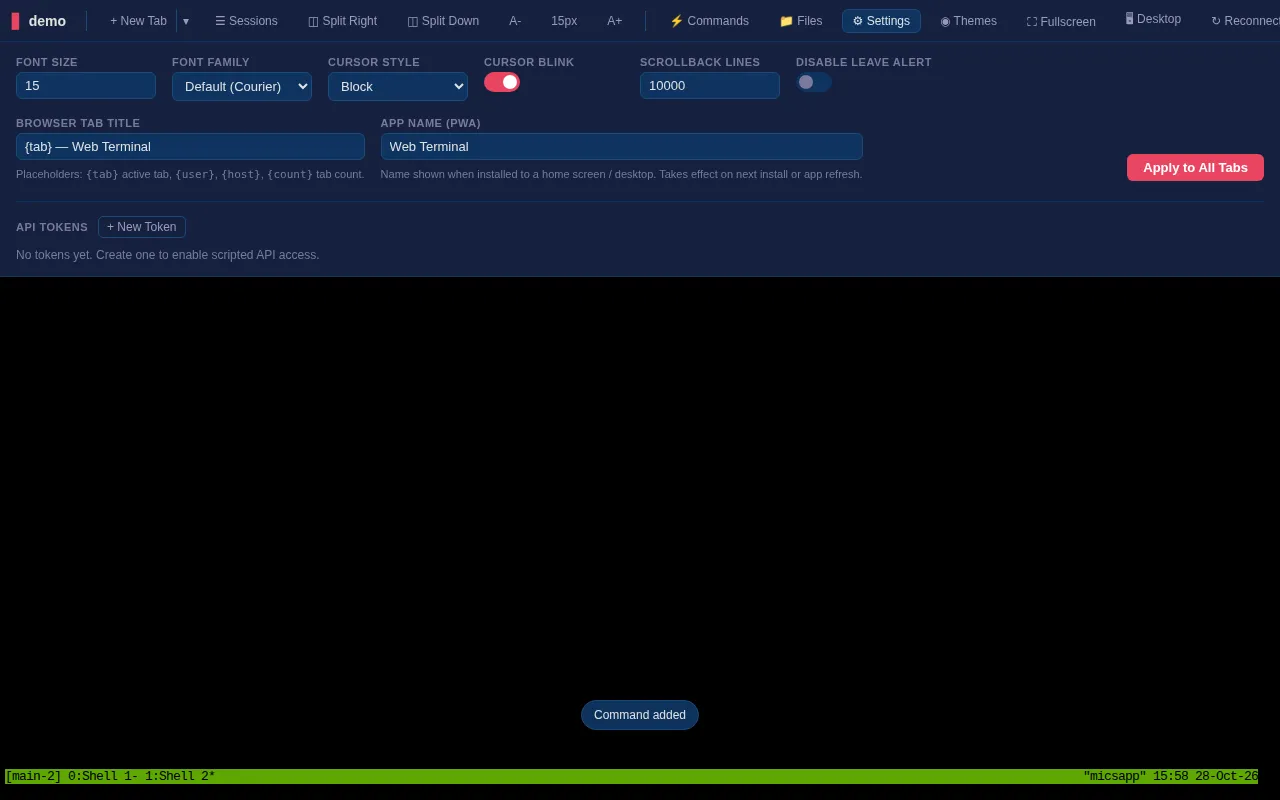
Open **Settings**, adjust the fields, then **Apply to All Tabs**. Applying reconnects terminal frames with the chosen appearance while preserving server sessions.
| Setting | Options or meaning |
| --- | --- |
| **Font Size** | 8–36 pixels; toolbar A−/A+ offers quick changes |
| **Font Family** | Default Courier, Menlo, Monaco, Consolas, Source Code Pro, Fira Code, JetBrains Mono or IBM Plex Mono; installed fonts determine rendering |
| **Cursor Style** | Block, Underline or Bar |
| **Cursor Blink** | On/off |
| **Scrollback Lines** | 100–100,000; default 10,000 |
| **Disable Leave Alert** | Suppress the browser's warning when leaving |
| **Browser Tab Title** | Template supporting `{tab}`, `{user}`, `{host}` and `{count}` |
| **App Name (PWA)** | Name used by the installed web app on its next install/refresh |
Settings for font, cursor, history, browser title, app name and API tokens. Select the image to enlarge it.
For example, `[{count}] {tab} — {user}` includes tab count, active tab and username. Terminal appearance and title settings are saved in this browser, so a second device can use a different presentation. The installed app name is also persisted through the account service for the manifest.
## Choose a theme or custom colors
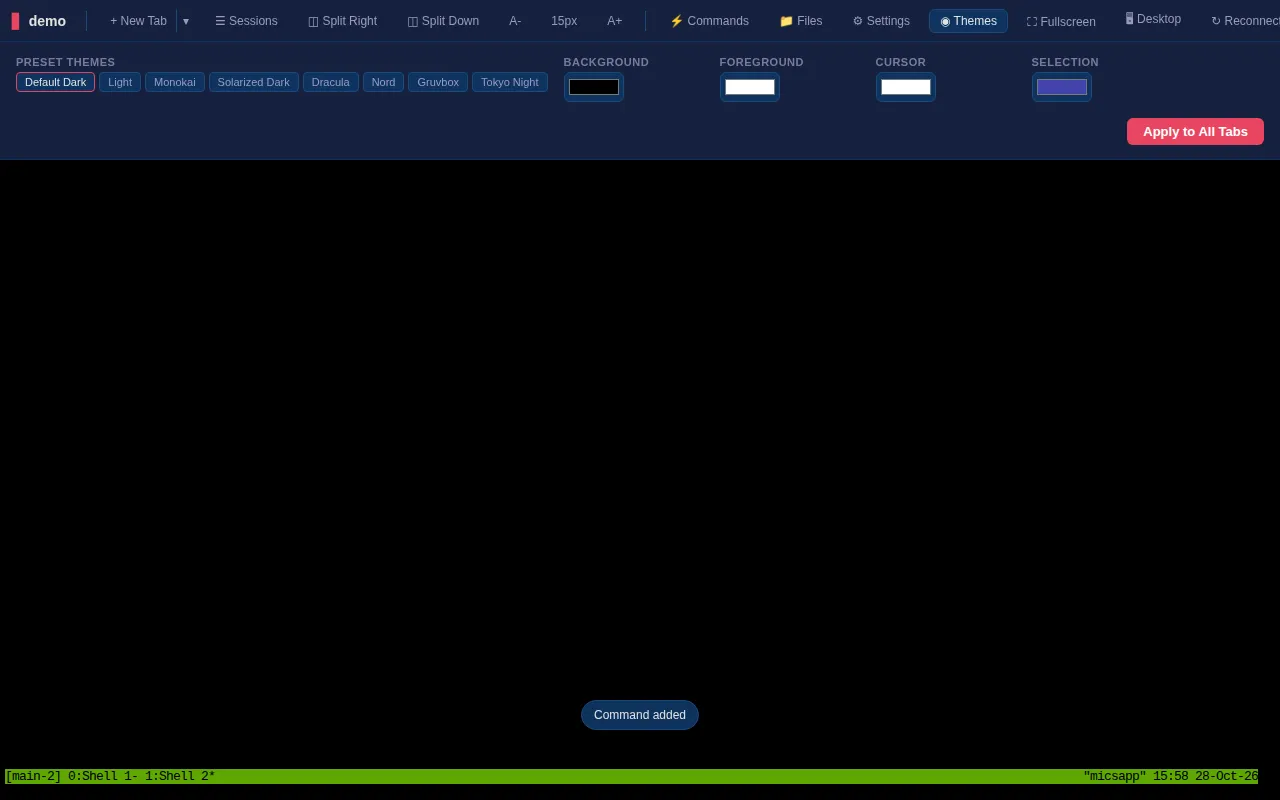
Open **Themes** and choose **Default Dark**, **Light**, **Monokai**, **Solarized Dark**, **Dracula**, **Nord**, **Gruvbox** or **Tokyo Night**. Alternatively set **Background**, **Foreground**, **Cursor** and **Selection** colors. Choose **Apply to All Tabs** to apply and remember the settings.
Preset themes and custom terminal color fields. Select the image to enlarge it.
Theme changes affect terminal appearance; programs running inside the terminal may also have their own color configuration. If a shell application sets its own background or styling, inspect that application's preferences too.
## Open configured remote servers and desktops
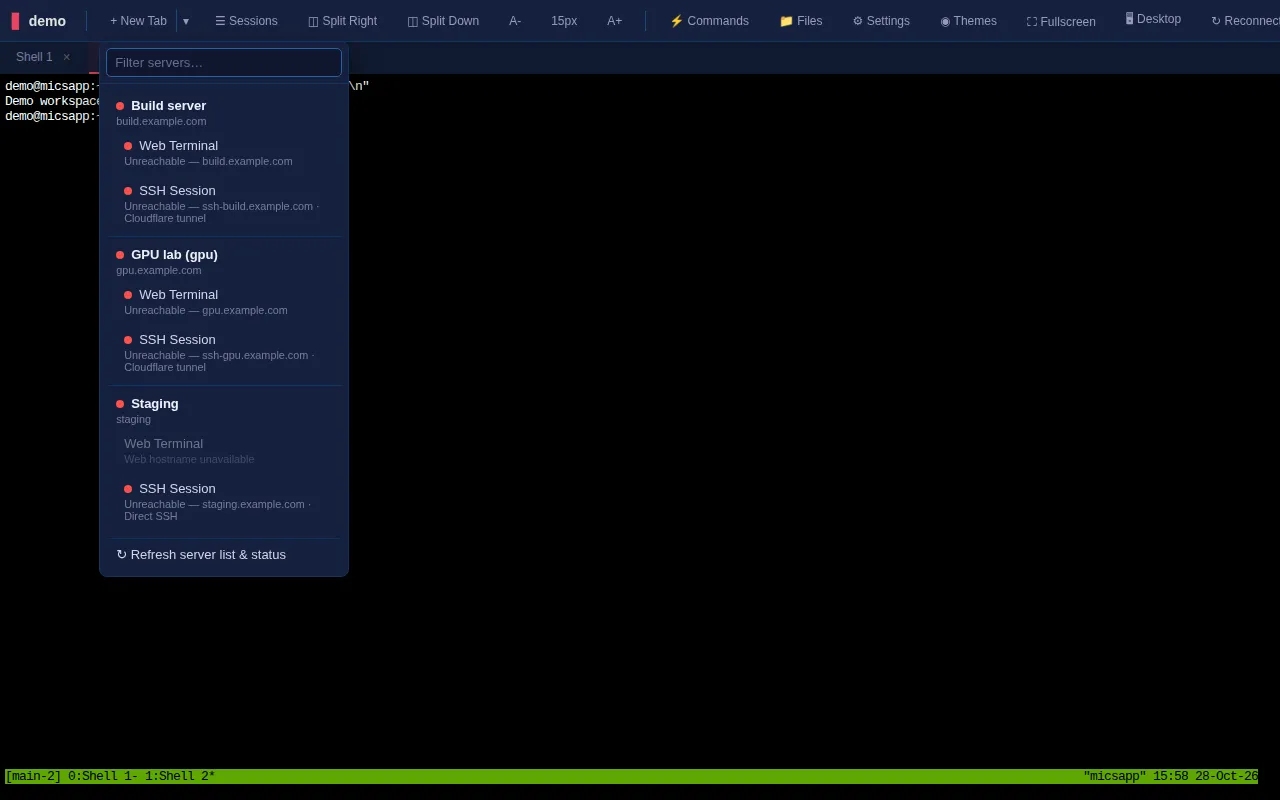
Open **▾** beside **+ New Tab**. Administrators publish remote-server entries and their status; refresh the list if a new server is missing.
| Connection | Behavior |
| --- | --- |
| **Web Terminal** | Opens the other server's web interface inside a tab; the destination may need its own login |
| **SSH Session** | Starts SSH from this server in a persistent shell; destination credentials/keys are still required |
The remote-server picker containing only fictional example servers. Select the image to enlarge it.
First-time SSH can ask for a host-key confirmation, then a password if no key is available. The app does not make an unavailable server reachable or supply a destination account. A blocked embedded Web Terminal may need the destination's framing configuration corrected by its administrator.
**Desktop** opens an optional noVNC graphical desktop in an app tab. Its side controls handle fullscreen and desktop-specific settings. A working server display and VNC service are required; the shell/file browser do not depend on VNC. The walkthrough did not connect to a real remote desktop.
## Work from phones and tablets
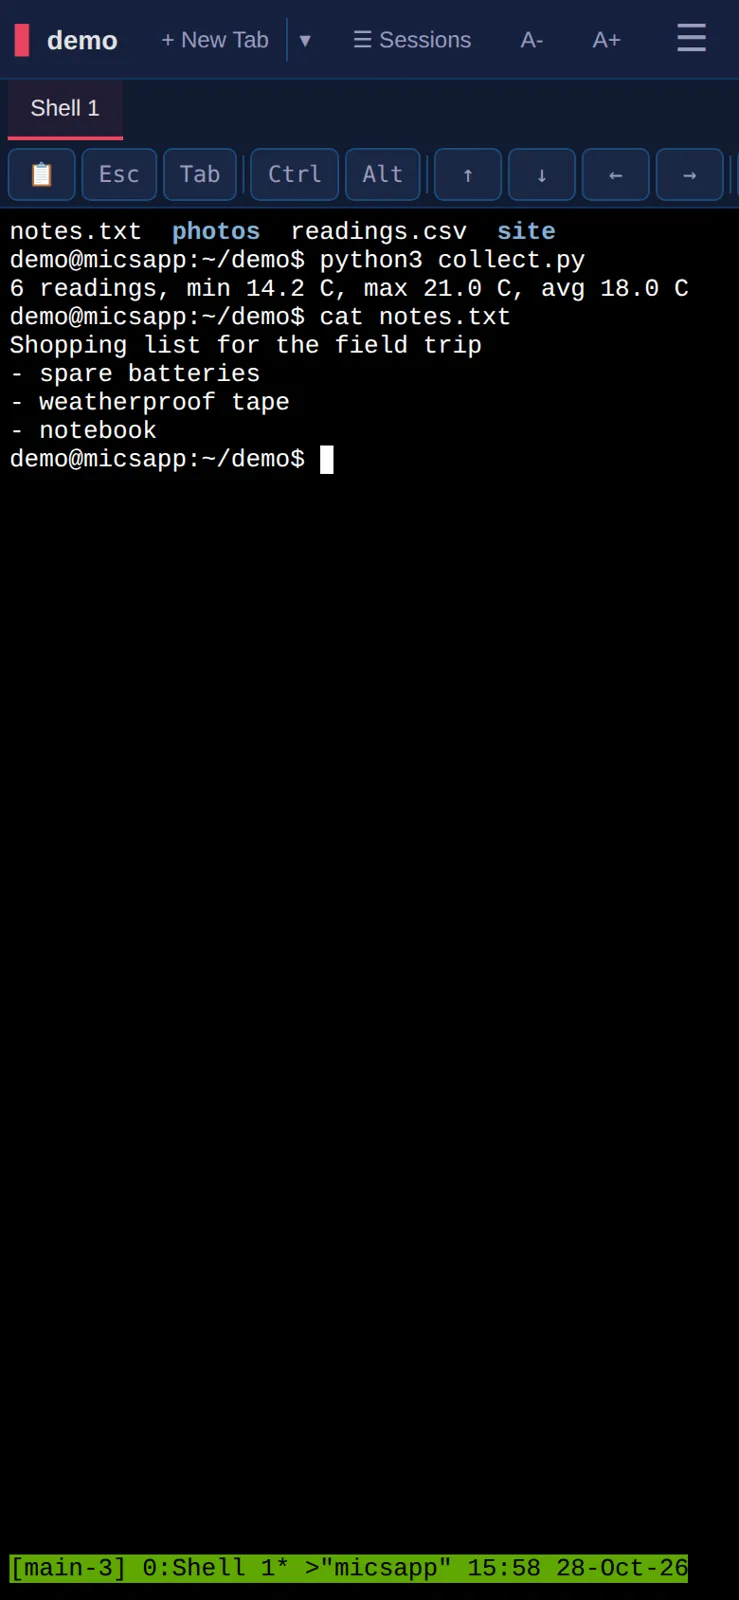
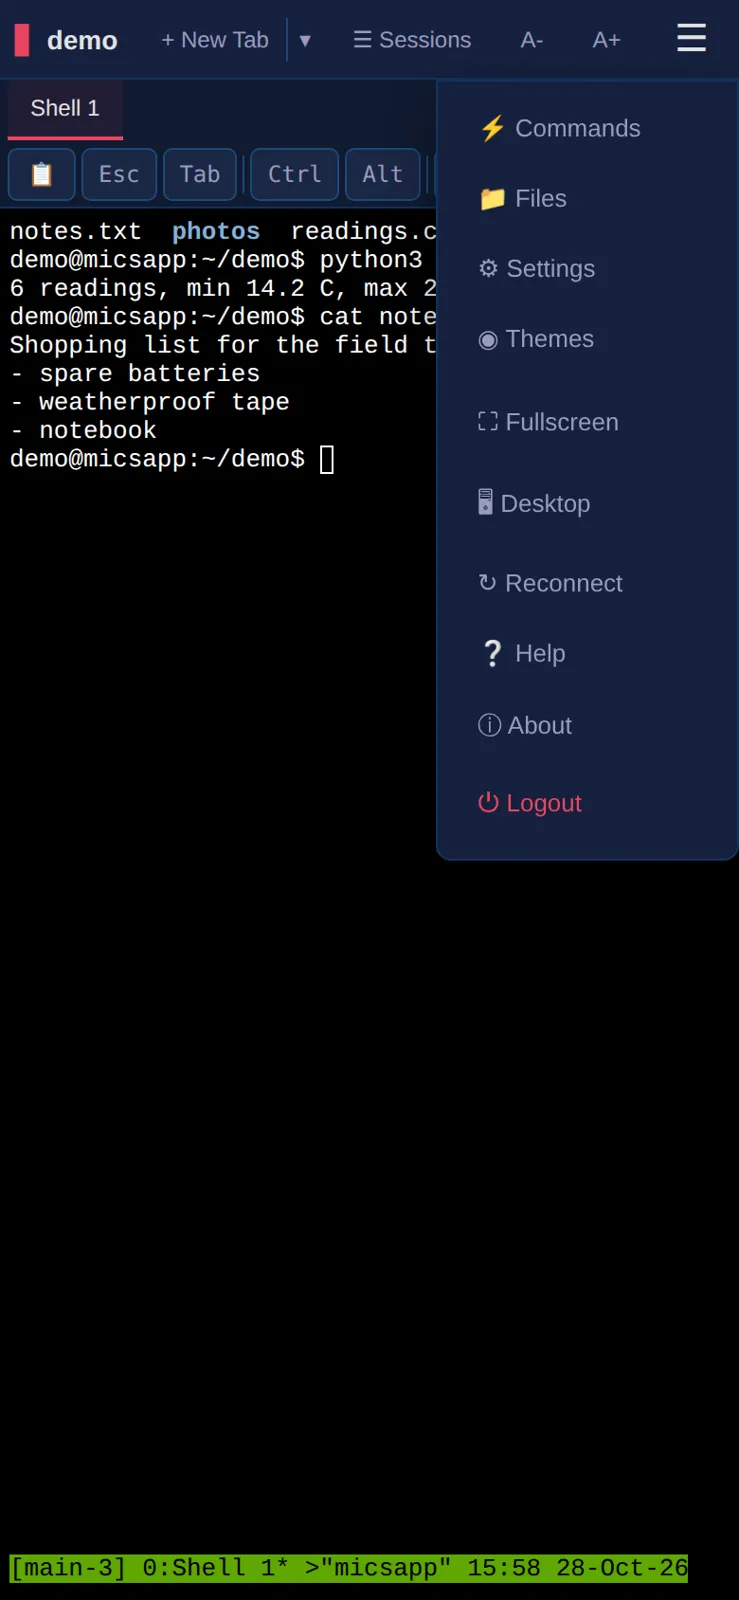
The compact toolbar retains essentials and moves the rest under **Menu**. The special-key strip provides keys such as **Esc**, **Tab**, **Ctrl**, **Alt**, arrows and editing/navigation keys that a phone keyboard may omit. Modifier toggles apply to the next relevant key rather than changing the server's account or shell.
The real terminal interface in an emulated phone browser using the fictional demo project. Select the image to enlarge it.
Long-press terminal text for selection/copy; the copy dialog provides selectable text and a **Copy** button when direct clipboard interaction is unreliable. Notes is useful for pasting long commands, multi-line text or reviewed voice dictation. Mobile browser keyboard and clipboard behavior varies; physical iOS/Android acceptance was not part of the emulation checks.
The compact phone Menu with Files, Settings, Help and other actions. Select the image to enlarge it.
Use the browser's Add to Home Screen/install action where available. A network connection is required for the remote shell even when the interface is installed; installation does not make the server available offline.
## Use desktop keyboard shortcuts
| Shortcut | Action |
| --- | --- |
| `Ctrl+Shift+T` | New tab |
| `Ctrl+Shift+W` | Close app tab and its shell |
| `Ctrl+Shift+]` / `Ctrl+Shift+[` | Next / previous app tab |
| `Ctrl+Shift+E` | Toggle Files |
| `Ctrl+Shift+\\` | Split right |
| `Ctrl+Shift+-` | Split down |
| `Ctrl+Shift+U` | Unsplit |
Browser and OS reservations can intercept these; toolbar controls provide the same actions.
## Create and revoke API tokens
1. Open **Settings → API Tokens → + New Token**.
2. Give it a descriptive name, such as `laptop`.
3. Copy the value immediately; the interface shows the secret only once.
4. Supply it as `Authorization: Bearer ` to the HTTP API.
5. Choose **Revoke** beside an old token when it should stop working.
Tokens permit programmatic file, command and account-authorized API actions. They cannot open the browser terminal's `/ut/` WebSocket directly. The CLI's interactive shell uses the separate authenticated `/api/shell` path. Treat a token as access to the account; the screenshots intentionally contain no token value.
## Use mics_cli and multiple server profiles
Obtain the standalone client binary or the `cli/` package from your administrator. The JavaScript package requires Node 18+; a packaged binary includes its runtime. Authenticate and check the target before issuing commands:
```sh
mics_cli login --url https://terminal.example.com
mics_cli whoami
mics_cli exec "pwd"
mics_cli ls ~
```
| Command family | Purpose |
| --- | --- |
| `exec "command"` | Run one command and return stdout/stderr and its exit status |
| `shell` | Open an interactive server shell over WebSocket |
| `ls`, `cat` | List directories and read text |
| `upload`, `download` | Transfer files |
| `mkdir`, `rm` | Create directories or remove files/directories |
| `tokens list`, `tokens revoke` | Manage bearer tokens |
| `quick-commands list/sync/export/import` | Manage the same saved-command library |
| `profiles`, `use`, `--profile` | Manage or select saved servers |
| `login`, `logout`, `whoami`, `help` | Authenticate, forget local credentials, inspect configuration and read help |
```sh
mics_cli exec "wc -l" --stdin-file ./readings.csv
mics_cli exec "ls" --cwd /tmp --timeout 60
mics_cli upload ./report.txt ~/uploads
mics_cli download ~/notes.txt -o ./notes.txt
mics_cli quick-commands export -o commands.json
mics_cli quick-commands import commands.json
mics_cli --profile demo exec "uname -a"
```
`exec` waits for completion: its default timeout is 30 seconds, with a 300-second maximum. Use an interactive shell or a deliberately detached server job for longer work. **exec's exit code is the remote command's exit code**, which makes it suitable for scripts. The HTTP `/api/exec` operation similarly accepts command, working directory, timeout and optional stdin.
Each login can create a saved server profile. **use** changes the active profile; `--profile NAME` targets one invocation. An explicit token or a local/parent `.env` can override the profile, so use **whoami** to check the URL and token source. **logout** forgets saved local authentication; revoke a token to invalidate it on the server.
## Read Help and report a problem
**Help** opens the illustrated user manual served by your installed server, so it matches that version. **About** shows app version, build and username and offers **View Manual**. The [repository manual](https://github.com/micsapp/micsapp-webterminal/blob/main/doc/manual.md) and [CLI reference](https://github.com/micsapp/micsapp-webterminal/blob/main/cli/README.md) provide additional examples when repository access is available.
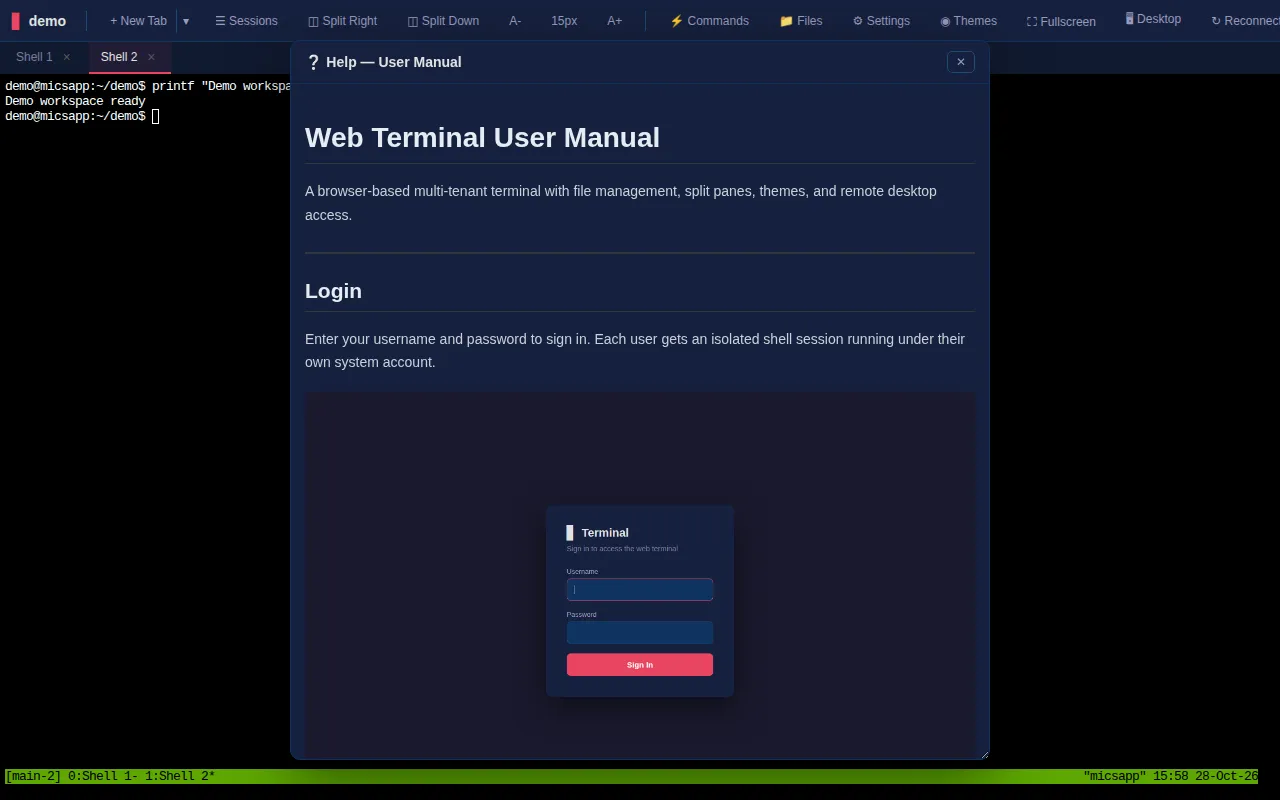
The built-in illustrated manual opened inside the sandboxed terminal. Select the image to enlarge it.
No rendered promo/tutorial video or native store listing was found in the reviewed repository. The main supporting material is the running interface and illustrated manual.
## Troubleshooting
| Symptom | What to do |
| --- | --- |
| Sign-in rejected | Check the system username/password and ask the administrator about account access |
| Blank/frozen terminal | Choose **Reconnect**, then find the existing shell in **Sessions** |
| Job lost after closing a tab | Closing the browser preserves sessions; the app-tab **×** ends its tmux window. Check Sessions to distinguish the two |
| Session gone on every device | The shell may have exited, been killed, or ended during a server restart |
| Command ran in the wrong pane | Check the active pane and any checked Sessions targets before Send |
| Split controls unavailable | Splitting is disabled below 768 px; use tabs on the phone |
| Browser captures a shortcut | Use the toolbar equivalent; browser/OS reservations vary |
| Upload/edit permission denied | Confirm the server path and your account's filesystem permissions |
| Clipboard image unavailable | Grant clipboard permission and copy an actual image; upload a file instead if needed |
| Markdown/HTML preview differs | Inspect Source and open the document in its original application if it needs unsupported resources |
| Deleted quick command returns | **Sync** merges the shared repository; it does not propagate your local deletion |
| Imported commands rejected | Supply a JSON array with name and command fields for each entry |
| Voice unavailable | Check HTTPS, microphone permission, browser recognition or the configured transcription service |
| Remote menu empty | Administrator configuration is required |
| SSH asks for password/host key | These belong to the destination's SSH connection, not the web login |
| Desktop fails while shell works | Ask the administrator to check the separate VNC service |
| CLI reaches the wrong server | Run **whoami** and inspect explicit flags, environment, `.env` and profile selection |
| CLI command times out | Set a suitable timeout or use shell/detached execution for longer work |
When reporting an issue, include About's build, device/browser, exact action and error. Keep passwords, token values and private terminal output out of screenshots sent to a public channel.